- Simulating a Facelift with the Freehand Tool
- Applying Skin Modifications with the Skin Treatments Tool
- Taking Screenshots of the Results
- Using Screenshots for Patient Education
- Sharing Screenshots with the Patient
- Sharing a 3D Video of the Face Simulation
- Sharing the Simulation via Lindapp (Optional)
- Conclusion
Arbrea Face enables plastic surgeons to share precise, AI-powered facial simulations with patients in a clear and engaging way. With tools for facelift simulation, skin treatment visualization, screenshots, and 3D videos, this workflow helps improve patient communication, education, and satisfaction—both in person and remotely.
Simulating a Facelift with the Freehand Tool #
-
Use the Freehand Tool to simulate lifting areas like the jawline, cheeks, or neck.

2. Adjust the brush size and carefully sculpt the targeted regions.

3. You can also use the Area Mode for broader adjustments.

Why This Matters:
Delivers a personalized, realistic preview of facelift results to your patient.
Applying Skin Modifications with the Skin Treatments Tool #
-
Open the Skin Treatments Tool to simulate smoothing or tightening.

2. Remove excess skin or improve texture based on the treatment being discussed.

Enhances the visual by combining volume correction and surface refinements.
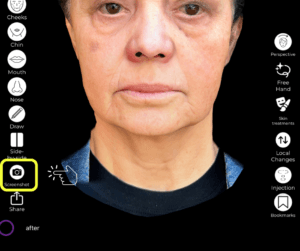
Taking Screenshots of the Results #
-
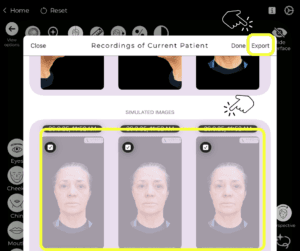
Once satisfied with the simulation, click to capture high-resolution screenshots.
-
Capture multiple angles:
-
Frontal
-
Profile (left and right)
-
¾ view
-
Ideal for documenting the simulation and building trust.
Using Screenshots for Patient Education #
-
Take additional screenshots before and after applying changes.
-
Use these visuals during the consultation to explain treatment areas and improvements.
Why This Helps:
Improves patient understanding of the procedure and expected results.
Sharing Screenshots with the Patient #
Send the captured images via:
-
-
Email
-
Airdrop (if in-person)
-
Secure messaging apps
-
Ensures the patient has reference material after the consultation.
Sharing a 3D Video of the Face Simulation #
-
Generate a 3D video showing a rotating view of the simulation.
-
The video gives patients a dynamic, lifelike perspective of the outcome.
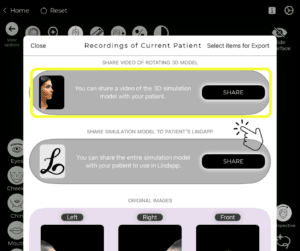
Increases patient confidence and helps them visualize natural results from all angles.
Sharing the Simulation via Lindapp (Optional) #
-
If you’re a Lindapp user, you can send the full simulation directly to the patient via Lindapp.
-
Patients can review their results anytime on their phone or device.
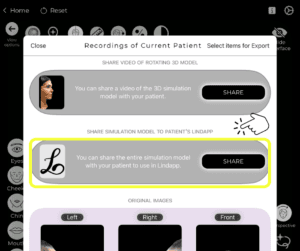
Great for remote consultations or follow-up interactions.
Conclusion #
Arbrea Face makes it easy to share facial simulations with patients using screenshots, educational visuals, and immersive 3D videos. When paired with Lindapp, it becomes a powerful platform for remote engagement and interactive patient communication, ultimately enhancing the consultation experience.
For more guidance, watch the full video tutorial below.


Responses