Arbrea Breast provides a seamless way on how to simulate implant replacement procedures, allowing plastic surgeons to remove, replace, and adjust implants while visualizing results in real time. With tools for volume analysis, shape refinement, scar visualization, and before-and-after comparisons, this feature enhances both surgical planning and patient communication.
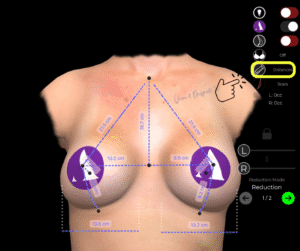
Viewing the Patient’s Breast Measurements #
- Start by opening the patient’s case in Arbrea Breast.
- Click on the Measurement Tool to access automatic breast measurements such as base width and projection.
Why It’s Important:
Gives a baseline for choosing a suitable replacement implant.
Viewing the Patient’s Breast Volume #
-
Click again to display the volume of the breast as calculated by Arbrea’s AI.
-
This helps you determine how much existing volume needs to be removed or adjusted.
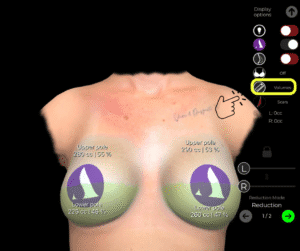
Essential for planning volume-matched implant replacements.
Removing Volume from the Breast #
-
While in the Reduction Mode try to simulate removing the existing implant volume.
-
Use the sliders to reduce volume precisely on one or both breasts.
-
Unlock the breasts’ sliders if they require asymmetrical adjustments.
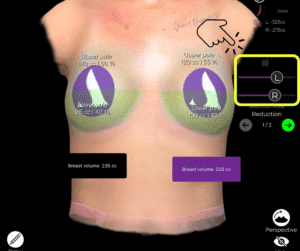
Allows you to simulate implant removal prior to selecting the replacement.
Choosing a New Implant for the Simulation #
-
Go to the Implant Catalog and select a new implant from the available brands.
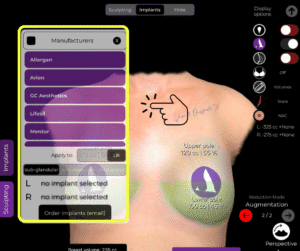
2. Filter by volume, diameter, or projection to find the right match.
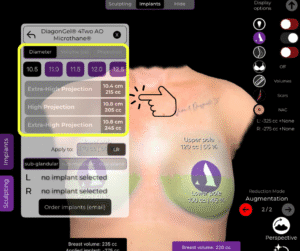
3. Apply the selected implant to one or both breasts.
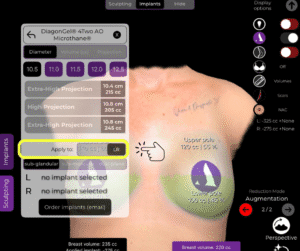
Makes it easy to compare different implant options for replacement.
Comparing Before and After Results #
-
Use the Before/After toggle to show the changes in volume and shape.
-
You can also use the side-by-side view or bookmark multiple options for comparison.

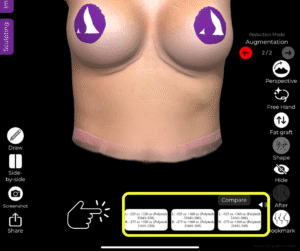
Enhances patient understanding and decision-making during consultations.
Viewing Scars #
-
Open the Scars Tool to show the incision marks based on your surgical approach.
2. Choose from scar types like periareolar, vertical, or inverted T depending on the procedure.
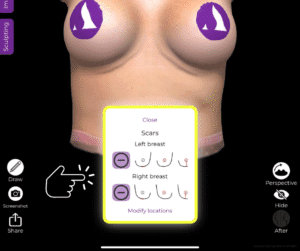
Helps patients visually anticipate surgical outcomes.
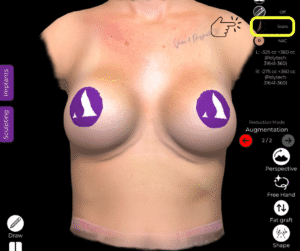
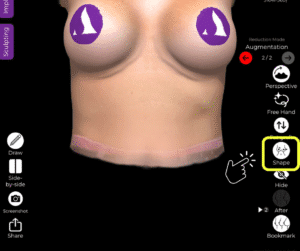
Adapting the Simulation with the Shape Tool #
Use the Shape Tool to fine-tune the final look:
-
-
Adjust lift, cleavage, projection, or breast positioning.
-
Modify based on your specific surgical technique and goals.
-

Adds realism and customization to the implant replacement simulation.
Conclusion #
With Arbrea Breast, simulating an implant replacement is fast, intuitive, and highly customizable. From removing the old volume to selecting a new implant, adjusting shape, and showing scars, the platform empowers plastic surgeons to create realistic visualizations and confident patient consultations.
For more guidance, watch the full video tutorial below.


Responses