Arbrea Face provides plastic surgeons with advanced tools to simulate facelift procedures with precision, speed, and realism. Whether you’re lifting the cheeks, smoothing wrinkles, or sculpting specific facial areas, Arbrea allows you to create interactive before-and-after visuals that enhance patient understanding and trust.
Using the Cheek Tool #
-
Begin by selecting the Cheek Tool to simulate volume enhancement or tightening in the mid-face.
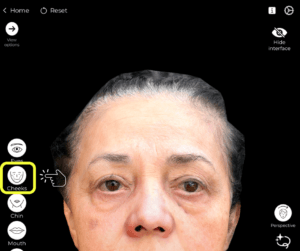
2. Adjust the effect using the slider to lift or fill the cheek area based on your surgical approach.

Why It Matters:
The cheeks are central to facial rejuvenation and can dramatically enhance overall appearance.
Sculpting with the Freehand Tool #
-
Use the Freehand Tool to sculpt and lift targeted areas of the face.

2. Choose between Brush Mode for soft adjustments or Area Mode to define a custom region.
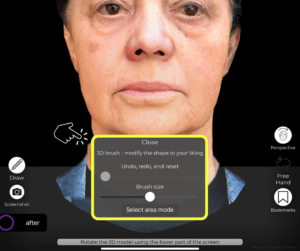
3. Sculpt regions such as the jawline, neck, or nasolabial folds.
Enables highly personalized facelift simulations.
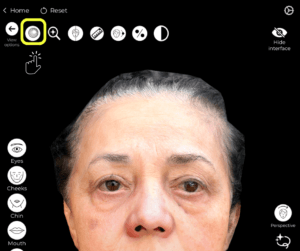
Deselecting and Switching to Another Area #
-
After working on one region, deselect it to continue sculpting another part of the face.
-
This allows you to refine the simulation progressively without affecting previously edited areas.
Offers full control and flexibility during the simulation process.
Removing Wrinkles with the Skin Treatments Tool #
-
Activate the Skin Treatments Tool to smooth fine lines and wrinkles.

2. Use it to simulate treatments like laser resurfacing or chemical peels alongside surgical lifts.

Helps visualize complementary treatments for full-face rejuvenation.
Comparing Before and After #
-
Use the Before/After slider to instantly show the difference.
-
Alternatively, enable a side-by-side comparison view for more detailed discussion with the patient.

Essential for effective communication and expectation management.
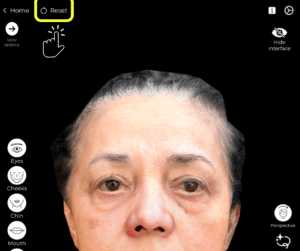
Resetting the Simulation #
If needed, you can reset the entire simulation to start fresh with a new approach or technique.
Saves time and allows for flexible iteration during consultations.
Fast-Track Facelifting – Recap Workflow #
-
For quick simulations, follow this condensed sequence:
-
Use the Cheek Tool
-
Refine with Freehand Tool
-
Smooth with Skin Treatments Tool
-
Share or compare using screenshots or 3D views
-
Helps streamline the process, especially for busy clinics or first-time patients.
Enhancing Results with the Vector Tool #
-
Use the Vector Tool to highlight the direction and depth of your adjustments.
-
This is helpful for educating the patient about how and where lifting occurs.
Adds a visual explanation layer to support your consultation narrative.
Conclusion #
Simulating a facelift procedure with Arbrea Face is fast, precise, and engaging. With tools like the Cheek Tool, Freehand Sculpting, Skin Treatments, and Vector Visualizations, plastic surgeons can create realistic simulations that enhance patient communication and build trust.
For more guidance, watch the full video tutorial below.


Responses